I used to make sourdough bread on a regular weekly basis but it has been years since I did that. And refreshing my memory by re-reading my books has highlighted that although I did make sourdough bread I didn't actually give it the time and attention that I should have. Well my excuse on that one is that I don't really like my bread too sour and I was also a very busy girl with a family and a business to run as well as trying to do the 'Good Life' in a semi detached in Oxfordshire with two allotments about a mile from the house. Yep... that's busy.
Now I have some time (well... retired so although I am busy I choose what I want to do) I thought I would really do it properly. Bread that takes it's time is generally tastier than a 'quick' loaf. Bread made with natural leavens and no yeast requires time to develop both taste and enough natural yeast in the dough to make it rise.
My starter or Fred as we call it was ready to use. I took out about a hundred grams of Fred and added a hundred grams of Organic Rye flour and a hundred grams (yup I weighed the water) of water. I left this mixture at room temperature for about six hours. Room temperature at this time of year is on average around 17C going up to 19C in the evening when the fire is on. After the six hours I added 200 grams of flour and an equal 200 grams of water and mixed it up.

I left it for about another four hours at room temperature to make sure that it was continuing to be active... sure enough just before going to bed it was definitely active. I wrapped it in clingfilm and put it in the fridge for the night.

First thing in the morning I took out my leavened flour mixture and let it come to room temperature again when I would be able to use it to make bread. The complicated bit is the next bit. You need to understand what Bakers Percentages are... because it isn't just simply a case of following a standard recipe. The leavened starter needs to be between 20 and 40 percent of your mix (with the weight of flour being 100%). I had Man make me an Excel Spreadsheet to work it out.

The flour (I used half white and half wholemeal) and the leaven and 1% salt is put into a bowl and the water added. I don't follow any percentage for the water at this stage because every flour is different and some need more and some need less water. I simply added sufficient water to make a pliable dough. And then I kneaded.

I had to split the dough into two portions because I can't knead any more than a kg of dough at one time, it's just too much hard work. I used a simple formula for making kneading easy. I knead the dough for five minutes and then put it to rest for fifteen minutes.

Then I repeated, kneading for another five minutes followed by fifteen minutes rest... and then once more. So the dough was actually kneaded in total for fifteen minutes with rests of fifteen minutes every five minutes.

I told you this was Slow Food! Then the dough is left to rise for about three hours (four would be better).
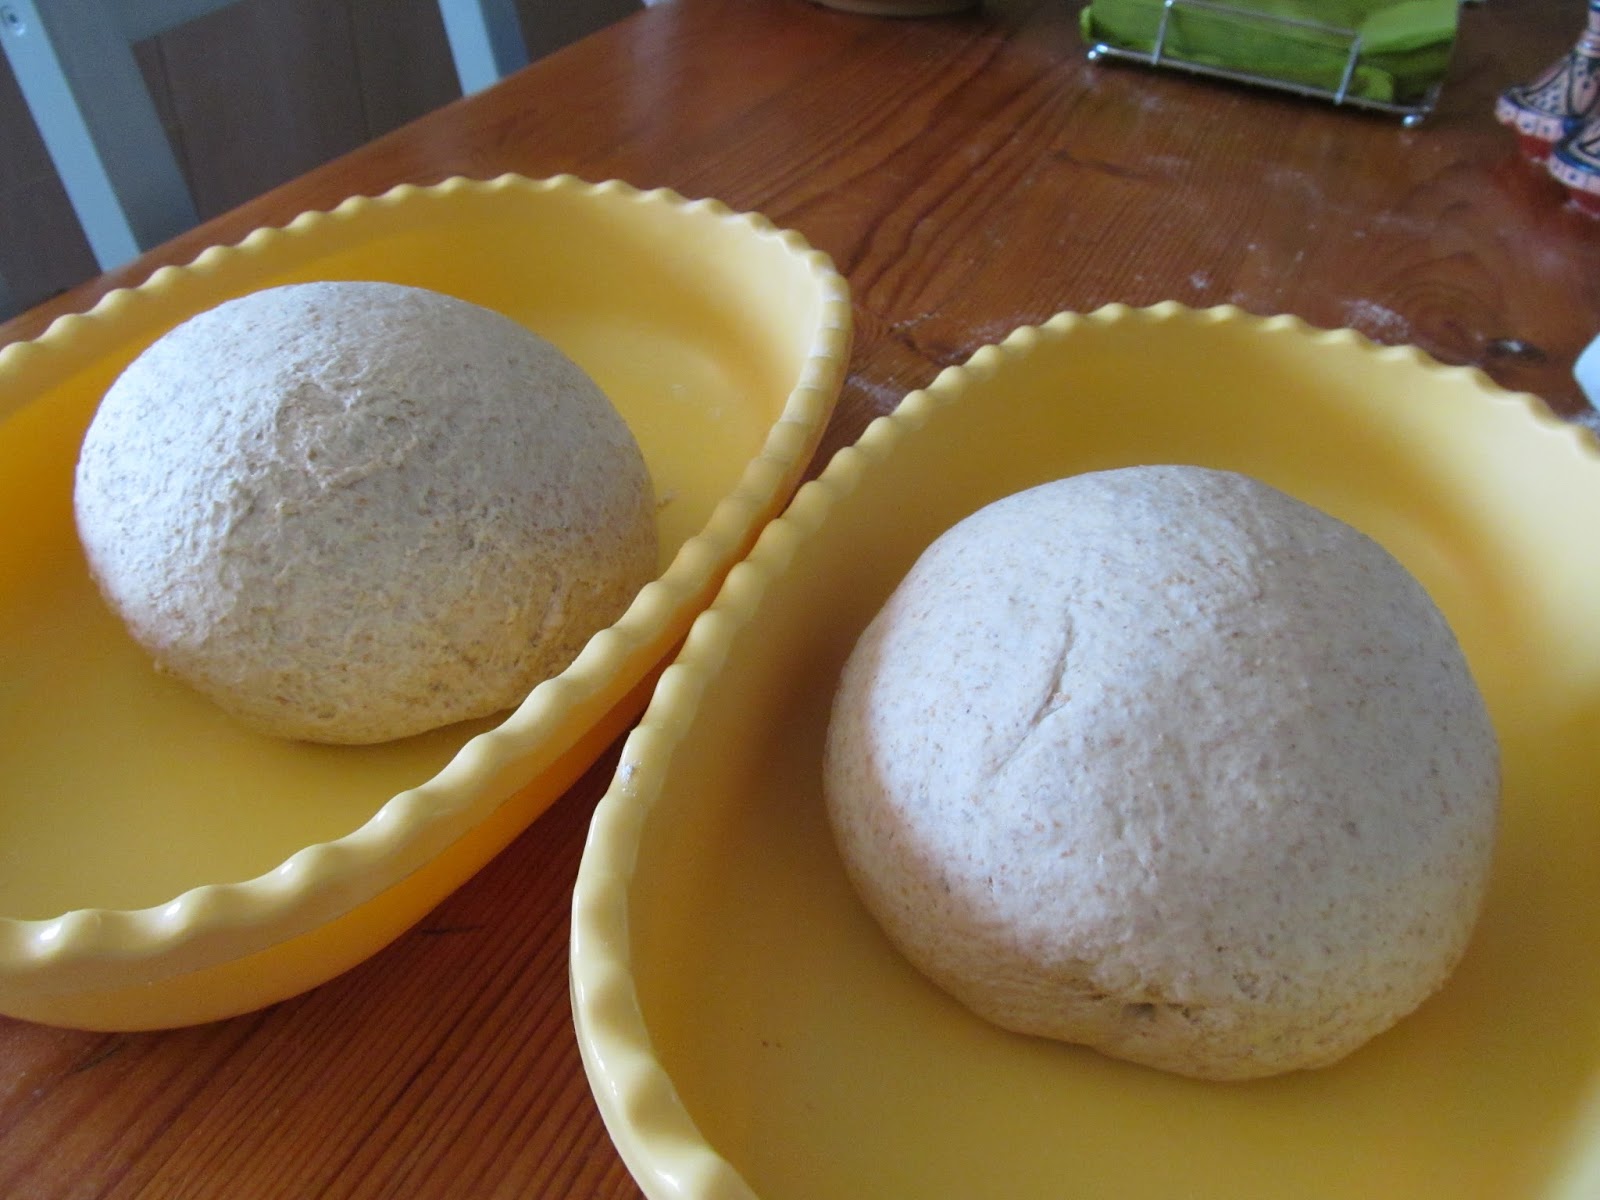
After three hours rising I knocked the air out of the dough and shaped it and put it into proving baskets. It was then left for two hours to prove (three would have been better).

After the proving time was up I baked the loaves in the electric oven. After all that faff I just couldn't work out the timing for lighting the bread oven.

To be honest the bread is so slow that it would have waited for the oven outside but I just chickened out. It is a tad cold today and really I think I should have lit it yesterday to pre-warm it if I really was serious about using it for bread today... (excuses). Next time, I'll do it.

Man bought a new gadget which is intended to check the internal temperature of meat (not that he doesn't trust my judgement, we've been married thirty years and I haven't poisoned him yet) without realising that it is perfect for me to use on bread. The internal temperature of bread when it is cooked is 94C, no doubts... no tapping the bottom of the loaf and wondering if it sounds hollow enough. Although nearly every bread recipe and bread book tells you the loaf is done when it sounds hollow, the truth is, the loaf is not always done when it sounds hollow - you can still get a gummy bit in the middle even though your loaf gave you a resounding 'dong' when you tapped the bottom.

15 minutes at 220C followed by 45 minutes at 190C and it was done. I knew this because the first loaf was cooked for half an hour at 220C and wasn't cooked when I tested it. So it went back in at a lower temperature for another half hour. The bread was fine, a little crusty due to the long time at the higher temperature but still very yummy. You can see that this is going to be challenging in the bread oven outside. You can't just turn the temperature down.

The second loaf was done perfectly. Yay!


And an hour later when we cut it?

Oh My!

Woman really really smug. Man says the two day wait was worth it, thank you Fred!

PS. Fred has been happily cooling in the fridge for two days now. He needs feeding today. Normally I would discard half of the mix and add some fresh flour and water and then put him back to cool his heels for about four days before repeating this exercise. Or instead of throwing away half the mix, use it to make another bread starter. Today instead of discarding half of the mix I am going to add it to a pancake batter and make savoury pancakes to be layered with a spicy sausage mixture and then covered in tomato salsa and cheese and put into the oven - lunch sorted.
No comments:
Post a Comment